Irresistible Crispy Prata Recipe | Homemade Cheese Prata
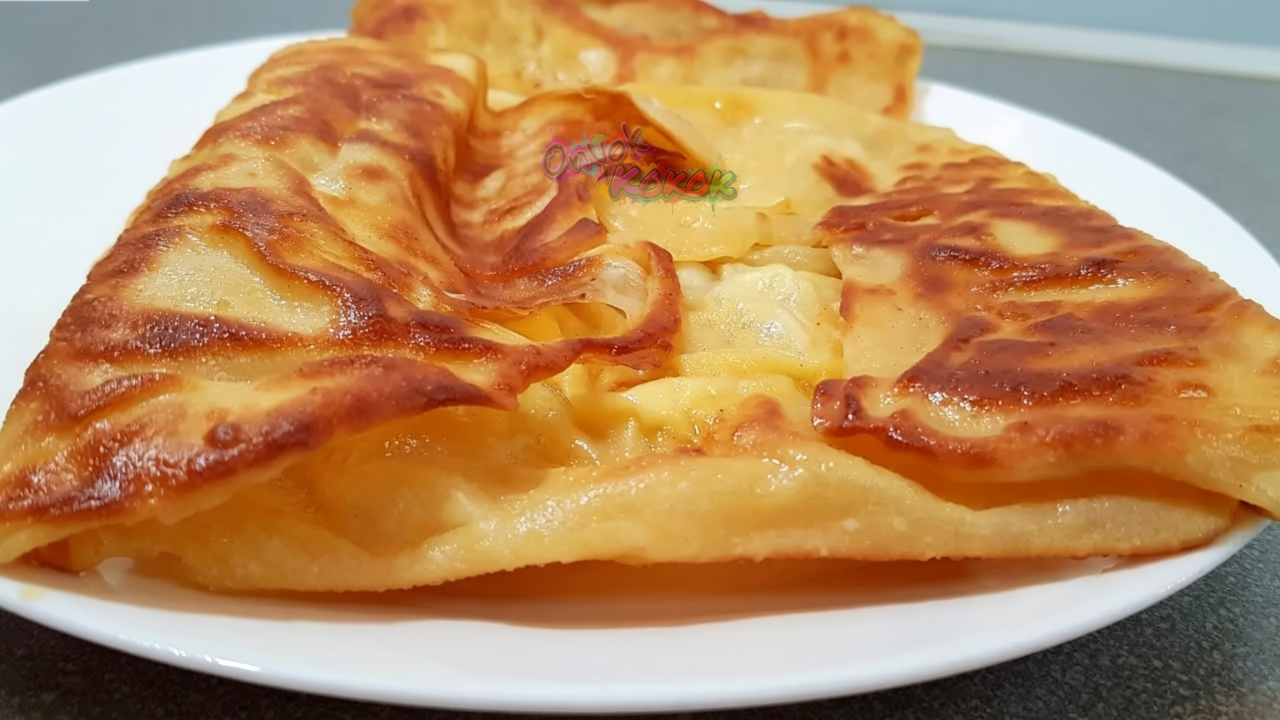
Homemade Crispy Prata with Cheese
If you’re looking for a crispy prata recipe that’s easy to make at home, you’ve come to the right place! This Homemade Crispy Prata with Cheese is crispy on the outside, chewy and stretchy on the inside, with a delicious buttery flavor that perfectly complements the melted cheddar cheese filling. Unlike ordinary flatbread, this homemade version is enriched with evaporated milk, butter, and cheese, making every bite incredibly satisfying.
Prata, also known as Roti Prata, is a popular flatbread commonly enjoyed in Singapore and Malaysia. It originated from the Indian flatbread known as paratha and has evolved into one of Southeast Asia’s favorite comfort foods. Traditionally served plain or with curry, prata has become incredibly versatile, with fillings like egg, onion, chocolate, banana, and cheese becoming household favorites.
In this recipe, I created my own version by making the dough richer with evaporated milk and adding butter throughout the cooking process. Instead of simply sprinkling grated cheese, I used slices of cheddar cheese commonly used for sandwiches, giving every bite a gooey and flavorful center.
One thing you’ll notice about this dough is how soft and sticky it is. Don’t worry – that’s completely normal! The high hydration creates the chewy texture that makes prata so addictive. Although you can knead by hand, using a stand mixer makes the process much easier and helps develop the gluten properly.
Another secret to achieving authentic homemade prata is patience. The dough needs two resting periods. This allows the gluten to relax so the dough can be stretched into a paper-thin membrane without tearing. This stretching technique creates the beautiful flaky layers once cooked.
Whether you’re preparing breakfast, afternoon merienda, or even a late-night snack, this crispy prata recipe is guaranteed to become a family favorite. Best of all, the ingredients are simple and easy to find in most supermarkets.
6 Tips for Perfect Homemade Crispy Prata with Cheese
1. Don’t Add Too Much Extra Flour
The dough is naturally soft and slightly sticky. Avoid adding too much flour while mixing or kneading. Only add the extra tablespoon of all-purpose flour if the dough is excessively sticky, just like shown in the video. A softer dough creates a crispy exterior and a chewy interior.
2. Never Skip the Resting Time
The two resting periods are essential. Resting allows the gluten to relax, making the dough much easier to stretch into a very thin sheet without tearing. This step is the secret to achieving flaky, layered prata.
3. Stretch the Dough as Thin as Possible
Gently stretch the dough until it becomes almost transparent, like a thin membrane. The thinner the dough, the more delicate and crispy the layers will be after folding and cooking.
4. Be Generous with the Butter
Brushing the dough with butter before folding adds richness, enhances the flavor, and helps create beautifully crisp, flaky layers. Adding a little butter to the pan while frying also gives the prata a delicious golden-brown finish.
5. Cook on Low to Medium-Low Heat
Cook the prata over low to medium-low heat to allow the layers to cook evenly without burning the butter. This helps achieve a crispy outside while keeping the inside soft, chewy, and perfectly cooked.
6. Let It Rest Before Serving
After cooking, let the prata rest for about 5 minutes before serving. This allows the melted cheese to settle slightly and helps keep the crispy layers intact, making it easier to enjoy without the filling spilling out.
Irresistible Crispy Prata Recipe | Homemade Cheese Prata
Ingredients
Dough
- 2 cups + 1 tablespoon all-purpose flour
- 1¼ teaspoons salt
- 2 tablespoons white sugar
- 1 egg
- 3 tablespoons boiling water
- 5 tablespoons evaporated milk
- 1 tablespoon boiling water
Additional Ingredients
- Butter
- Cheddar cheese slices sandwich cheese
- Cooking oil
Instructions
- In a large mixing bowl, combine the all-purpose flour, sugar, salt, and boiling water.
- In a separate cup, mix the evaporated milk with 1 tablespoon hot water.
- Pour the milk mixture into the flour mixture.
- Using a stand mixer, knead until just combined.
- Add the egg and continue kneading for 10 minutes until smooth.
- If the dough is still very sticky, add another tablespoon of flour and knead for another 2 minutes.
- Rub the dough with cooking oil.
- Cover with cling wrap and let it rest for 1 hour.
- Divide into 6 equal portions.
- Roll each into a ball.
- Place each dough ball in a container and pour enough cooking oil to coat completely.
- Cover again and rest for another hour.
- Stretch each dough into a very thin sheet until almost transparent.
- Brush generously with butter.
- Place cheddar cheese slices in the center.
- Fold all four sides toward the middle until the cheese is completely enclosed.
- Heat a frying pan over low heat.
- Add a slice of butter.
- Cook the folded prata until both sides become golden brown and crispy.
- Allow to cool for about 5 minutes before serving. Enjoy while hot!
Other Ways of Cooking – Crispy Prata Recipe
Air Fryer
Yes! You can cook the prepared cheese prata in an air fryer.
- Preheat to 180°C (356°F).
- Lightly brush both sides with butter.
- Air fry for 8-10 minutes, flipping halfway through.
- Cook until golden brown and crispy.
Oven
You can also bake it.
- Preheat oven to 190°C (375°F).
- Place on a lined baking tray.
- Brush generously with butter.
- Bake for 12-15 minutes, flipping once halfway through.
Although both methods work well, pan-frying still gives the crispiest layers and the richest buttery flavor.
Storage
Refrigerator (Recommended)
After dividing the dough into 6 balls and coating each generously with cooking oil, place them in individual containers or on a tray with enough space between each dough ball. Cover tightly with cling wrap or transfer to an airtight container. Store in the refrigerator for up to 2 days.
Before using, let the dough sit at room temperature for 30 to 60 minutes until soft and easy to stretch. Cold dough is more likely to shrink or tear.
Freezer
You can also freeze the oiled dough balls for up to 1 month. Wrap each dough ball individually with plastic wrap, then place them in a freezer-safe bag or airtight container.
When ready to use, thaw them overnight in the refrigerator, then let them come to room temperature for 30 to 60 minutes before stretching, filling, and cooking.
Can I Store Cooked Prata?
Yes, but freshly cooked prata has the best texture. If you have leftovers, store them in an airtight container in the refrigerator for up to 2 days. Reheat in a pan over low heat until warmed through and crispy again. Avoid microwaving, as it can make the prata soft and chewy instead of crispy.
Frequently Asked Questions
Q: Why is my dough very sticky?
A: This recipe intentionally uses a soft dough. Sticky dough produces a chewy and flaky prata. If it’s excessively sticky, simply add another tablespoon of flour as shown in the video.
Q: Can I knead by hand?
A: Yes. A stand mixer simply makes the process easier because the dough is very sticky.
Q: Can I use mozzarella instead?
A: Yes. Mozzarella gives a stretchier cheese pull, while cheddar provides a richer flavor.
Q: Why do I need two resting periods?
A: Resting relaxes the gluten, making the dough easy to stretch very thin without tearing.
Q: Can I prepare the dough ahead of time?
A: Yes. After forming the dough balls and coating them with oil, refrigerate overnight. Let them return to room temperature before stretching.
Q: Can I make plain prata?
A: Absolutely! Simply skip the cheese filling and cook as usual.
Q: Can I make it sweeter?
A: Yes. You can sprinkle sugar over the butter before folding or drizzle condensed milk after cooking for a sweet version.
Crispy Prata Recipe Video
For more recipe videos, visit our YouTube channel, Onyok Kokok, by clicking the link below.
https://www.youtube.com/@onyokkokok8538
Discover more step-by-step written recipes by clicking the link below.
Filipino Recipes & Cooking – Onyok Kokok Kitchen
Final Note
This Crispy Prata Recipe proves that you don’t need to visit a restaurant to enjoy authentic homemade prata. Once you master this Crispy Prata Recipe, you’ll be able to make buttery, flaky, and cheesy prata whenever you’re craving it. Whether served for breakfast, merienda, or a quick snack, this Crispy Prata Recipe is one you’ll want to make again and again.
Whether you’re serving it for breakfast, merienda, or a midnight snack, this homemade cheese prata is guaranteed to impress your family and friends. Give this recipe a try, and don’t forget to share your results.