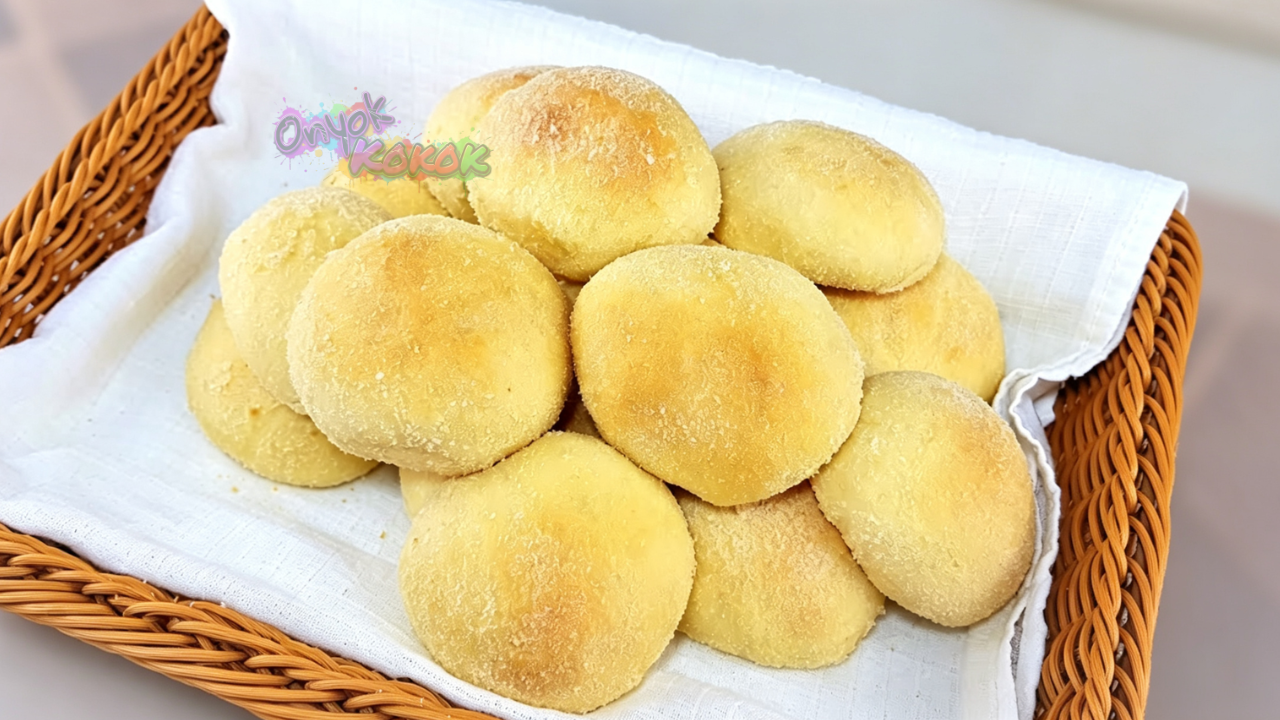
The Ultimate Soft Pandesal Recipe That Stays Fluffy Even the Next Day
Soft Pandesal Recipe – The Best Homemade Pandesal That Stays Soft Even the Next Day
Nothing beats the aroma of a freshly baked Soft Pandesal straight from the oven. With its golden breadcrumb coating, fluffy interior, and slightly sweet flavor, pandesal has been a staple on Filipino breakfast tables for generations. Whether paired with butter, cheese, peanut butter, jam, or enjoyed on its own with a hot cup of coffee, this classic Filipino bread never goes out of style.
If you’ve been searching for the best Soft Pandesal Recipe, you’ve come to the right place. This recipe combines all-purpose flour and bread flour, creating a softer and fluffier texture than using all-purpose flour alone. The bread flour provides extra gluten for better structure while the all-purpose flour keeps the crumb light and tender. The result is a bakery-style pandesal that stays soft even the next day.
Unlike many recipes that require expensive ingredients, this homemade pandesal uses simple pantry staples. Even beginners can successfully make this recipe by following a few important bread-making techniques. From properly blooming the yeast to performing the windowpane test, every step helps ensure light, airy, and delicious pandesal every time.
Whether you’re baking for your family, selling homemade bread, or simply craving warm pandesal, this recipe is sure to become one of your favorites.
Softest Pandesal Recipe 9 Tips
1. Bloom the Yeast Properly
Although instant yeast can usually be mixed directly into flour, blooming it in warm water with sugar first helps confirm that the yeast is still active. Within 5 to 10 minutes, the mixture should become foamy. If it doesn’t foam, your yeast may already be inactive.
2. Use Warm Water, Not Hot
Water that is too hot can kill the yeast. Aim for warm water that feels comfortably warm to the touch, around 38°C to 43°C (100°F to 110°F).
3. Combine All-Purpose Flour and Bread Flour
Using both flours gives you the best of both worlds. Bread flour develops stronger gluten, making the bread rise higher and stay soft longer, while all-purpose flour keeps the crumb light and tender.
4. Don’t Add Too Much Flour While Kneading
The dough will feel sticky at first. Resist the urge to keep adding flour. As you continue kneading, the gluten develops and the dough gradually becomes smoother and easier to handle.
5. Perform the Windowpane Test
Stretch a small piece of dough gently. If it forms a thin membrane without tearing easily, the gluten has developed enough for soft and fluffy bread.
6. Lightly Oil the Dough Before Rising
Rubbing a thin layer of cooking oil over the dough prevents it from drying out while proofing.
7. Allow the Dough to Fully Double
Don’t rush fermentation. Depending on room temperature, the dough may take 1 to 2 hours to double in size.
8. Use Fine Breadcrumbs
Traditional pandesal has a light coating of fine breadcrumbs. If your breadcrumbs are coarse, pulse them in a blender or food processor for a few seconds before coating the dough.
9. Avoid Overbaking
Bake only until lightly golden. Overbaking dries out the bread and reduces its soft texture.
The Ultimate Soft Pandesal Recipe That Stays Fluffy Even the Next Day
Ingredients
For the Dough
- 1 cup all-purpose flour 160 grams
- 1 cup bread flour 160 grams
- 1/4 cup white sugar or 1/3 cup if using water instead of evaporated milk
- 1/2 teaspoon table salt
- 3/4 cup evaporated milk room temperature (or room temperature water)
- 3 tablespoons butter softened (Do NOT melt.)
For the Yeast
- 1½ teaspoons instant yeast
- 1/4 cup warm water
- 1 tablespoon white sugar taken from the sugar above
Coating
- 1/2 cup fine breadcrumbs
Instructions
- In a small bowl, combine the warm water, sugar, and instant yeast. Let it bloom for 5 to 10 minutes or until foamy.
- In a large mixing bowl, combine the all-purpose flour, bread flour, remaining sugar, and salt.
- Add the evaporated milk and the bloomed yeast mixture.
- Mix until a rough dough forms.
- Add the softened butter and continue mixing until incorporated.
- Transfer the dough onto a lightly floured work surface.
- Knead until smooth and elastic. The dough will be sticky initially, but avoid adding too much flour. Continue kneading until it passes the windowpane test.
- Lightly coat the dough with cooking oil.
- Place the dough in a bowl, cover, and let it rise for 1 to 2 hours or until doubled in size.
- Punch down the dough to release air.
- Divide into 14 to 15 equal pieces, approximately 45 grams each.
- Shape each piece into a smooth ball.
- Roll each dough ball in fine breadcrumbs.
- Arrange on a baking tray, leaving space between each piece.
- Cover and let them rest for 15 to 30 minutes.
- Preheat the oven to 170°C.
- Bake for 18 to 20 minutes, or until lightly golden.
- Serve warm and enjoy with butter, cheese, jam, peanut butter, or your favorite filling.
Other Ways to Cook: Air Fryer
Yes! You can bake pandesal in an air fryer.
- Preheat to 160°C.
- Bake for approximately 10 to 14 minutes, depending on your air fryer model.
- Avoid overcrowding the basket for even baking.
Storage Tips
Room Temperature
Store in an airtight container for up to 3 days.
Refrigerator
Not recommended, as refrigeration tends to dry out bread faster.
Freezer
Freeze baked pandesal for up to 2 months. Wrap tightly before freezing.
To Reheat
Warm in a 150°C oven for about 5 minutes, in an air fryer for 2 to 3 minutes, or microwave for 10 to 20 seconds.
Frequently Asked Questions
Why combine bread flour and all-purpose flour?
Bread flour contains more protein, producing stronger gluten that creates a better rise and keeps the bread softer for longer. All-purpose flour balances the texture, making the crumb lighter and more tender.
Can I use only all-purpose flour?
Yes, but the pandesal may not stay as soft the following day. Combining both flours gives better texture and longer-lasting softness.
Can I skip blooming instant yeast?
Technically yes, since instant yeast can be mixed directly with flour. However, blooming it first confirms that your yeast is active before you mix the dough.
Why is my dough sticky?
Bread dough naturally starts sticky. As gluten develops through kneading, it becomes smoother. Avoid adding excessive flour because it can make the bread dense.
Why didn’t my pandesal rise?
Possible reasons include:
Old or inactive yeast
Water that was too hot
Cold room temperature
Insufficient proofing time
Can I substitute evaporated milk with water?
Yes. If using water instead of evaporated milk, increase the sugar to 1/3 cup for better flavor.
How do I know when kneading is enough?
Use the windowpane test. Stretch a small piece of dough. If it becomes thin without tearing, it’s ready.
Why roll the dough in breadcrumbs?
Breadcrumbs create the signature crust that makes classic Filipino pandesal instantly recognizable while adding a slight texture to the outside.
Soft Pandesal Recipe video:
For more recipe videos, visit our YouTube channel, Onyok Kokok, by clicking the link below.
https://www.youtube.com/@onyokkokok8538
Discover more step-by-step written recipes by clicking the link below.
Filipino Recipes & Cooking – Welcome to onyokrecipes.com
Final Note
Making homemade pandesal is easier than many people think. The key is patience – allow the dough enough time to rise, knead it until properly developed, and avoid adding too much flour. These simple techniques make a huge difference in achieving bakery-quality results.
This Soft Pandesal Recipe produces beautifully fluffy bread with a tender crumb, light golden crust, and classic breadcrumb coating. Best of all, thanks to the combination of bread flour and all-purpose flour, these rolls remain soft even the next day. Once you try this Soft Pandesal Recipe, you’ll never want to buy store-bought pandesal again.